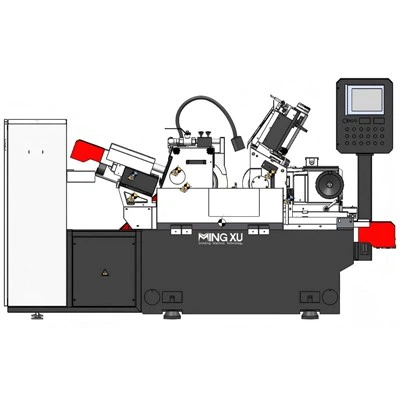
Hey there! I’m a supplier of Precision Centerless Grinders, and I’m stoked to share with you how to install one of these bad boys. Whether you’re a seasoned pro or just starting out in the machining world, this guide will walk you through the process step by step. Precision Centerless Grinder
Pre – installation Checks
Before we even start the installation, there are a few things you gotta check. First off, make sure you’ve got the right space. The grinder needs a flat, stable surface. You don’t want it wobbling around while it’s doing its thing. Measure the area where you plan to put the grinder. It should be big enough to fit the machine with some extra room around it for easy access.
Next, check the power supply. Our Precision Centerless Grinders are designed to work with specific voltage and amperage. You don’t want to fry the machine by plugging it into the wrong power source. Get an electrician to double – check if you’re not sure. Also, make sure there are no power surges in your area. You might want to invest in a surge protector to keep your grinder safe.
Inspect the parts. When the grinder arrives, open up the box and take a good look at all the components. Check for any damage during shipping. If you find anything broken or missing, contact us right away. We’ll get you the replacement parts asap.
Unpacking and Assembly
Once you’ve done all the pre – checks, it’s time to unpack the grinder. Carefully remove all the parts from the box. There’ll be an instruction manual that comes with the grinder, and it’s your best friend at this stage.
Start by assembling the base. It’s usually the biggest part, and it’s the foundation of the whole machine. Use the bolts and nuts provided to secure the base to the floor. Make sure it’s level. You can use a spirit level to check. If it’s not level, the grinder won’t work properly, and it could cause all sorts of problems down the line.
After the base is in place, start attaching the other components. There’s the grinding wheel, the regulating wheel, and the work rest blade. Each part has its specific place, so follow the manual closely. The grinding wheel is the one that does the actual grinding, so make sure it’s installed correctly. The regulating wheel controls the speed and movement of the workpiece, and the work rest blade supports the workpiece during grinding.
Electrical and Hydraulic Connections
Now, it’s time to hook up the electrical and hydraulic systems. The electrical connections are pretty straightforward if you’ve got the right voltage. Connect the power cord to the appropriate outlet. But be careful! If you’re not an electrician, it’s better to have a professional do it.
The hydraulic system is a bit more complicated. It’s responsible for the movement of the grinding and regulating wheels. You’ll need to connect the hydraulic hoses to the right ports. Make sure there are no leaks. A leaky hydraulic system can cause the grinder to malfunction and can also be a safety hazard.
Alignment and Calibration
Once everything is assembled and connected, it’s time to align and calibrate the grinder. Alignment is crucial. The grinding wheel and the regulating wheel need to be perfectly parallel to each other. You can use a dial indicator to check the alignment. If they’re not parallel, the workpiece won’t be ground evenly.
Calibration is all about getting the right settings for the grinder. You’ll need to set the speed of the grinding and regulating wheels, the feed rate, and the depth of cut. These settings depend on the type of material you’re grinding and the desired finish. The instruction manual will have some guidelines, but you might need to do some trial and error to get the perfect settings.
Testing and Commissioning
After alignment and calibration, it’s time to test the grinder. Start by running it without a workpiece. Listen for any strange noises. If you hear anything unusual, stop the grinder right away and check for problems.
Once it runs smoothly without a workpiece, it’s time to test it with a sample workpiece. Start with a small piece and see how the grinder performs. Check the finish of the workpiece. If it’s not up to par, you might need to adjust the settings again.
If everything goes well, you’re ready to commission the grinder. That means it’s officially up and running, and you can start using it for your production.
Maintenance Tips
To keep your Precision Centerless Grinder in top shape, regular maintenance is a must. Clean the grinder after each use. Remove any chips or debris that might have accumulated. Check the grinding wheel for wear and tear. If it’s worn out, replace it.
Lubricate the moving parts regularly. This will reduce friction and keep the grinder running smoothly. Also, check the hydraulic fluid level and replace it if necessary.
Why Choose Our Precision Centerless Grinders

Our Precision Centerless Grinders are top – notch. We’ve been in the business for a long time, and we know what it takes to make a great grinder. They’re built with high – quality materials, so they’re durable and reliable. We offer excellent customer support. If you have any problems during installation or use, our team is always ready to help.
Surface Grinding Machine If you’re interested in purchasing a Precision Centerless Grinder, or if you have any questions about the installation process or the product, don’t hesitate to get in touch. We’re here to make your experience with our grinder as smooth as possible. Let’s talk about how we can meet your machining needs.
References
- "Precision Centerless Grinding Handbook"
- Manufacturer’s Instruction Manual for Precision Centerless Grinders
Wuxi Mingxu Machinery Equipment Co., Ltd.
As one of the most professional precision centerless grinder manufacturers and suppliers in China, we’re featured by quality products and good price. Please rest assured to buy the best precision centerless grinder for sale here from our factory. Also, custom service is available.
Address: No. 5-5 Jinke Wealth Plaza, Changjiang North Road, Xinwu District, Wuxi City, Jiangsu Province
E-mail: yingyingmxjd@163.com
WebSite: https://www.mingxu-china.com/